TLDR
Low-resolution sticker artwork is not automatically ruined, but it needs to be checked before you order.
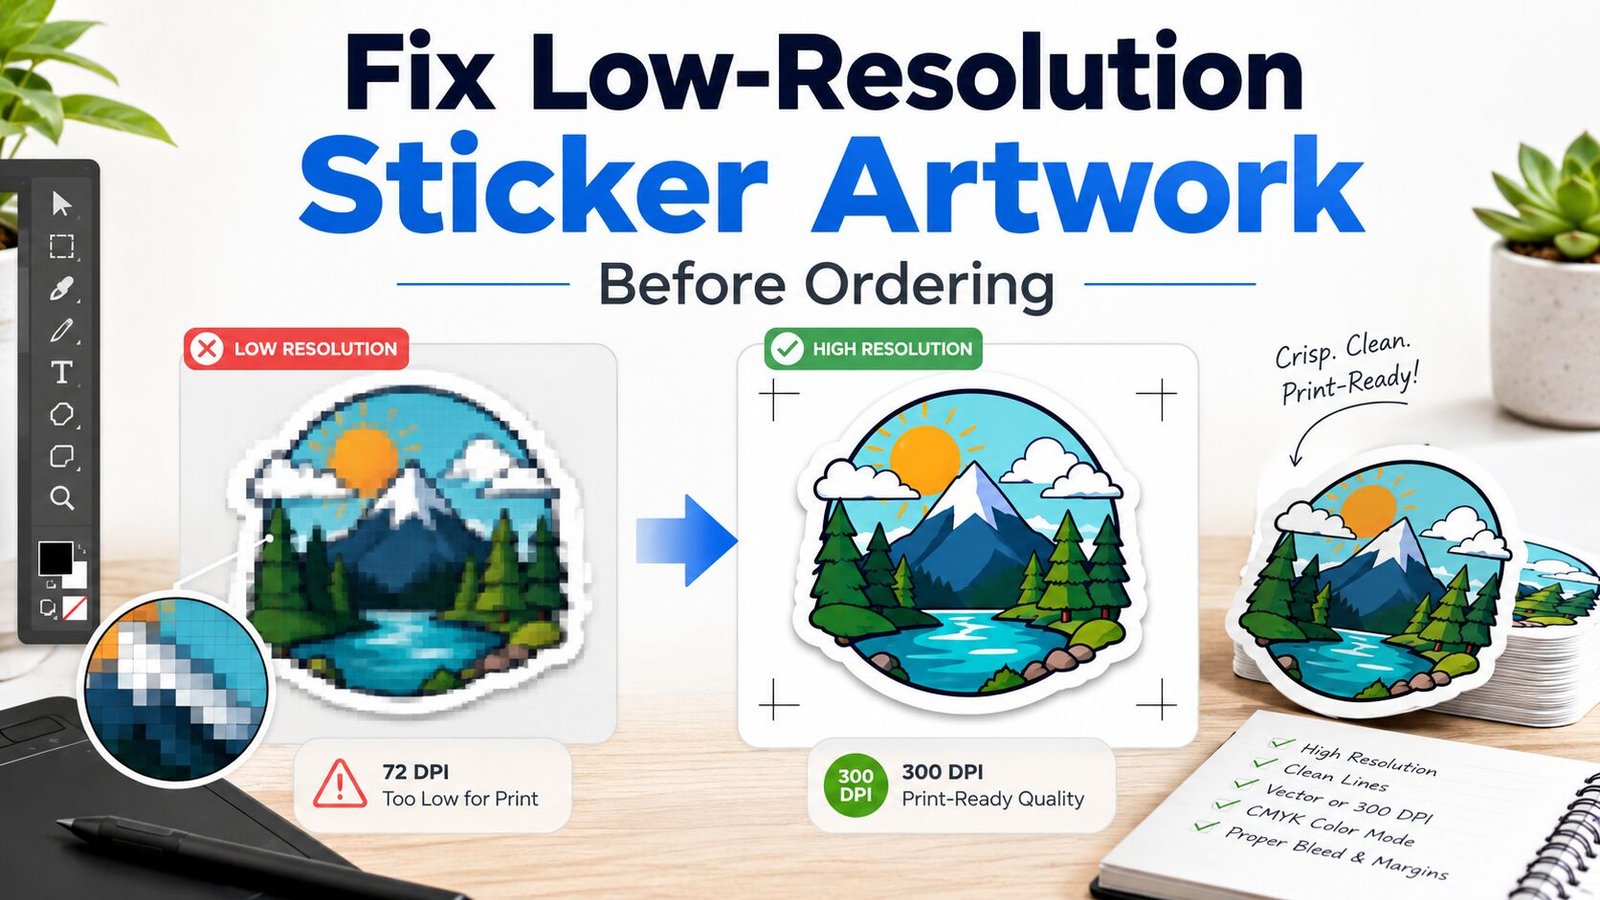
The fastest way to diagnose it is to compare the file’s pixel dimensions against the final sticker size. For most small stickers, aim for about 300 PPI at the printed size. If the file falls short, the best fix depends on the artwork: find the original file, resize the sticker smaller, rebuild text and logos as vector artwork, use AI upscaling carefully, or redraw the design.
A sticker design can look perfectly fine on your phone and still print soft, jagged, or fuzzy. Screens are forgiving. Printed stickers are not.
That’s why it helps to know how to fix low-resolution sticker artwork before ordering. You do not need to become a professional prepress technician. But you do need to understand a few basic ideas: final print size, pixel dimensions, raster vs. vector artwork, bleed, cut lines and proofing.
The good news is that most file problems fall into a small number of buckets. Some can be fixed in a few minutes. Others need the original artwork or a redraw. And some designs are honestly better printed smaller instead of being stretched into a blurry mess.
First, Check The Artwork At The Final Sticker Size
The most common mistake is checking artwork at screen size instead of print size.
A 600 x 600 pixel image may look sharp on a website or phone. But if you order that design as a 4-inch sticker, it only has 150 pixels per inch. That may look soft up close, especially if the artwork has small text, thin lines, detailed illustration, or a clean logo edge.
Use this simple formula:
Pixels ÷ inches = PPI
So if your artwork is 900 pixels wide and your sticker will be 3 inches wide:
900 ÷ 3 = 300 PPI
That is usually a good target for small printed stickers.
Here’s a quick reference:
| Sticker Size | Good Pixel Size At 300 PPI |
|---|---|
| 2 x 2 inches | 600 x 600 pixels |
| 3 x 3 inches | 900 x 900 pixels |
| 4 x 4 inches | 1200 x 1200 pixels |
| 5 x 5 inches | 1500 x 1500 pixels |
| 6 x 6 inches | 1800 x 1800 pixels |
This does not mean every file under 300 PPI is unusable. A painterly design, soft watercolor illustration, or intentionally rough texture may be more forgiving. A sharp logo, QR code, tiny product label, thin line drawing, or text-heavy sticker needs more care.
Also, do not trust the DPI number by itself. A file can say “300 DPI” in its metadata and still be too small. Pixel dimensions matter more than the label.
Understand Raster Vs. Vector Artwork
Before you choose a fix, identify what kind of file you have.
Raster artwork is made of pixels. Common raster files include JPG, PNG, TIFF and many Photoshop files. Photos, Procreate drawings, scanned art and most web images are raster files. Raster artwork loses quality when enlarged too much.
Vector artwork is made of paths, curves and shapes. Common vector formats include AI, SVG, EPS and some PDFs. Logos, icons, flat illustrations and typography often work best as vector files because they can scale without becoming pixelated.
This matters because the right fix depends on the design.
A low-resolution photo usually needs a better source image or careful upscaling.
A low-resolution logo should usually be rebuilt or traced as vector artwork.
A screenshot of text should almost always be retyped, not upscaled.
A hand-drawn illustration may need a mix of cleanup, upscaling and edge refinement.
The Best Fix Is Usually Finding The Original File
Before you start editing, look for the cleanest version of the artwork.
Check for:
- the original design file
- a larger PNG export
- an AI, SVG, EPS or PDF version
- the original Procreate, Photoshop, Illustrator, Canva, or Affinity file
- the original camera image or scan
- a version saved before it was compressed for social media
This is the boring fix, but it is usually the best one. A file downloaded from Instagram, Facebook, Etsy, a website preview, or a text message may have been compressed. Compression can create fuzzy edges, blocky artifacts and muddy color transitions.
If you can get the source file, use it. Do not spend half an hour repairing a damaged preview image when the clean file is sitting in a folder somewhere.
Resize The Sticker Smaller When The Design Allows It
Sometimes the cleanest fix is not editing the artwork. It is ordering a smaller sticker.
For example, a 900-pixel-wide design is a strong fit for a 3-inch sticker at about 300 PPI. But if you order it at 5 inches wide, it drops to 180 PPI. That does not automatically fail, but the printed result will be less sharp.
This is especially useful for:
- simple character stickers
- hand-lettered designs
- small logo giveaways
- planner stickers
- laptop stickers
- artwork with no tiny text
It is less useful for product labels, warning labels, QR stickers, barcode stickers, or anything that needs small details to stay readable.
A good rule: if the design has fine detail, rebuild the file. If the design is simple and bold, reducing the print size may solve the problem.
Rebuild Text Instead Of Upscaling It
Text is one of the first things to look bad when printed from a low-resolution file.
Upscaling can make letters larger, but it usually does not make them truly clean. Small type may become lumpy. Curved letters may look uneven. Thin strokes may thicken or break apart.
The better fix is to retype the text in a design program and match the font as closely as possible. Then export the final file at the correct size.
For vector workflows, convert the final text to outlines before sending the file to print. This prevents font substitution issues. It also keeps the letter shapes stable if the printer opens the file on a different system.
This matters most for:
- business logo stickers
- product labels
- ingredient labels
- QR code stickers
- event stickers
- packaging seals
- warning or instruction stickers
If the words matter, rebuild them cleanly.
Convert Logos And Simple Art To Vector
Logos, icons, mascots and flat graphics are often better fixed as vector artwork than as upscaled pixels.
You can use tools like Illustrator’s Image Trace for simple designs, but auto-trace is not magic. It can create too many points, rough edges, strange color breaks, or distorted shapes. It works best when the original image has strong contrast, clean edges and a limited color palette.
For a simple black logo, auto-trace may get you close.
For a detailed cartoon, textured illustration, or shaded design, hand cleanup is usually needed.
For a brand logo, manual vector rebuilding is often worth it. A slightly wrong logo looks cheap fast. The curve of a letter, the spacing between shapes and the smoothness of the outline all matter more than people expect.
After vectorizing, check the design at the final sticker size. Zooming in on a computer can help, but also view it at actual size. You want clean shapes, not just technically vector shapes.
Use AI Upscaling Carefully
AI upscaling can help with low-resolution sticker artwork, especially for illustrations, paintings, photos and artwork with soft texture. It can add pixels in a smarter way than basic resizing.
But it can also invent details.
That is fine if the artwork is decorative and the result still looks like the original. It is not fine if the design includes a logo, exact character art, small type, a QR code, technical drawing, or anything where accuracy matters.
Use AI upscaling for:
- soft illustrations
- scanned drawings
- photos
- painterly art
- low-detail artwork that only needs mild enlargement
Be careful with AI upscaling for:
- brand logos
- typography
- barcodes
- QR codes
- detailed line art
- faces
- art where exact style matters
After upscaling, inspect the file closely. Look for melted edges, odd textures, fake details, over-sharpened lines and distorted letters. The file may be larger, but larger is not the same as better.
Clean Up JPEG Artifacts And Rough Edges
Low-resolution sticker artwork often has more than one problem. It may be small, but it may also have compression artifacts, fuzzy edges, stray pixels, background noise, or a rough white box around the art.
Common cleanup steps include:
- remove unwanted backgrounds
- erase stray pixels around the design
- smooth rough outer edges
- reduce noise or compression blocks
- sharpen only after resizing
- adjust contrast so edges are clearer
- redraw broken lines
- repaint damaged areas manually
Be careful with sharpening. A little sharpening can help after upscaling. Too much sharpening creates crunchy edges and halos. That can look worse in print than a slightly soft image.
For die-cut stickers, pay close attention to the outside edge of the artwork. The cut line will follow the shape or sit near it, so messy edges can become much more obvious once the sticker is cut.
Add Bleed And Keep Important Details Inside The Safe Area
Fixing resolution is only part of print-ready sticker artwork.
You also need to think about bleed and safe area.
Bleed is extra artwork that extends beyond the cut edge. It helps prevent thin white slivers if the cut shifts slightly.
The safe area is the space inside the cut line where important details should stay. Text, faces, logos and fine details should not sit right on the edge.
Each printer may use slightly different requirements, so check the upload guidelines before ordering. A common setup is to extend background color or artwork beyond the cut line and keep important details tucked slightly inside the trim edge.
This is especially important for full-bleed stickers, where the color or artwork runs all the way to the edge. If the artwork is already low-resolution, stretching it outward to create bleed can make edge quality worse. In that case, you may need to extend the background manually instead of enlarging the whole design.
Export The Right File Type
The best export depends on the artwork.
For raster artwork, a high-resolution PNG, TIFF, PSD, or print-ready PDF can work well. PNG is useful for transparent backgrounds. TIFF and PSD can preserve more image data, though not every online printer accepts them.
For vector artwork, PDF, AI, EPS, or SVG may be accepted, depending on the printer. PDF is often the easiest final format because it can preserve vector shapes, embedded raster images and layout details in one file.
Before uploading, check:
- final sticker dimensions
- pixel dimensions for raster artwork
- transparent background, if needed
- bleed
- safe area
- color mode requirements
- file size limits
- whether fonts are outlined
- whether linked images are embedded
- whether the design includes a cut line, if required
If the printer provides a proof, review it carefully. The proof is your chance to catch size, crop, border and cut line issues before production.
When To Ask For Help
Some artwork is worth fixing yourself. Some is better handed to a designer or the printer’s art team.
Fix it yourself if the issue is simple:
- the file is slightly small
- the sticker can be ordered smaller
- the background needs basic cleanup
- the text can be retyped easily
- the printer only needs a better export
Ask for help if:
- the logo needs to be rebuilt
- the art has tiny text
- the file came from a screenshot
- the edges are damaged
- the design needs a custom cut line
- the artwork has heavy compression
- the sticker is for retail packaging
- the print run is large enough that mistakes would be expensive
There is no shame in asking for a file check. It is much cheaper to catch a low-resolution problem before ordering than to receive a stack of stickers that look soft.
A Simple Pre-Order Checklist
Before you order, run through this checklist:
- Is the artwork sized to the final sticker dimensions?
- Does the raster image have enough pixels for the print size?
- Is text rebuilt or outlined instead of screenshotted?
- Are logos vector or high-resolution?
- Has the background been cleaned up?
- Are the edges smooth enough for a die-cut shape?
- Is there enough bleed for full-bleed stickers?
- Are important details inside the safe area?
- Is the file exported in a format the printer accepts?
- Did you review the proof at the actual sticker size?
This checklist will not fix every artwork issue, but it catches the problems that cause most blurry sticker orders.
Final Thoughts
The best way to fix low-resolution sticker artwork before ordering is to avoid guessing. Check the pixel dimensions. Compare them to the final sticker size. Decide whether the design should be rebuilt, vectorized, upscaled, cleaned up, printed smaller, or replaced with the original file.
Not every low-resolution file is a disaster. A bold 3-inch sticker may print fine from a file that would look terrible as a 6-inch decal. But small text, clean logos and detailed line art need more care.
When in doubt, make the file cleaner instead of just making it bigger. Bigger pixels are still pixels. Clean artwork, sized correctly and reviewed in proof form, gives you the best shot at stickers that look sharp when they arrive.
FAQs
Can I Just Change The DPI To 300?
Not by itself. Changing the DPI number without adding real pixel detail does not magically improve the artwork. It may change the stated print size, but the image still has the same amount of original information.
What Is The Best Resolution For Sticker Artwork?
For most small stickers, 300 PPI at the final print size is a strong target. Larger decals may sometimes work at lower resolution because they are viewed from farther away, but small stickers are usually seen up close.
Can Canva Artwork Be Used For Stickers?
Yes, Canva artwork can work for stickers if the design is exported at the right size and the images used inside the design are high enough quality. Problems usually happen when low-resolution photos, screenshots, or small web graphics are placed into a larger sticker layout.
Should I Use PNG Or PDF For Sticker Printing?
Use PNG when you need a transparent background for raster artwork. Use PDF when you want to preserve layout, vector shapes, text outlines, or a mix of raster and vector elements. Always check the printer’s accepted file types.
Can AI Fix Pixelated Sticker Art?
AI upscaling can improve some low-resolution artwork, but it cannot always recover true detail. It works best for illustrations and photos. It is risky for logos, small text, QR codes and precise brand artwork.
What If My Sticker Proof Looks Blurry?
Ask the printer whether the proof is showing the actual print file quality or just a low-resolution preview. If the real artwork is low-resolution, pause the order and upload a better file before approving production.